Gaussian Splatting in macOS 100% free
After watching Olli Huttunen’s gaussian splatting experiments with both, the Insta360 and the Antigravity A1 I wondered if there was an option to do the same, but with an Apple Silicon Macintosh and using free/libre software, and the answer is a resounding yes, it can be done.
Update: Thanks to a comment from @ichsan2895 I switched to PyCOLMAP and it runs quite fast now, the whole project in less that 3 hours, vídeo guide:
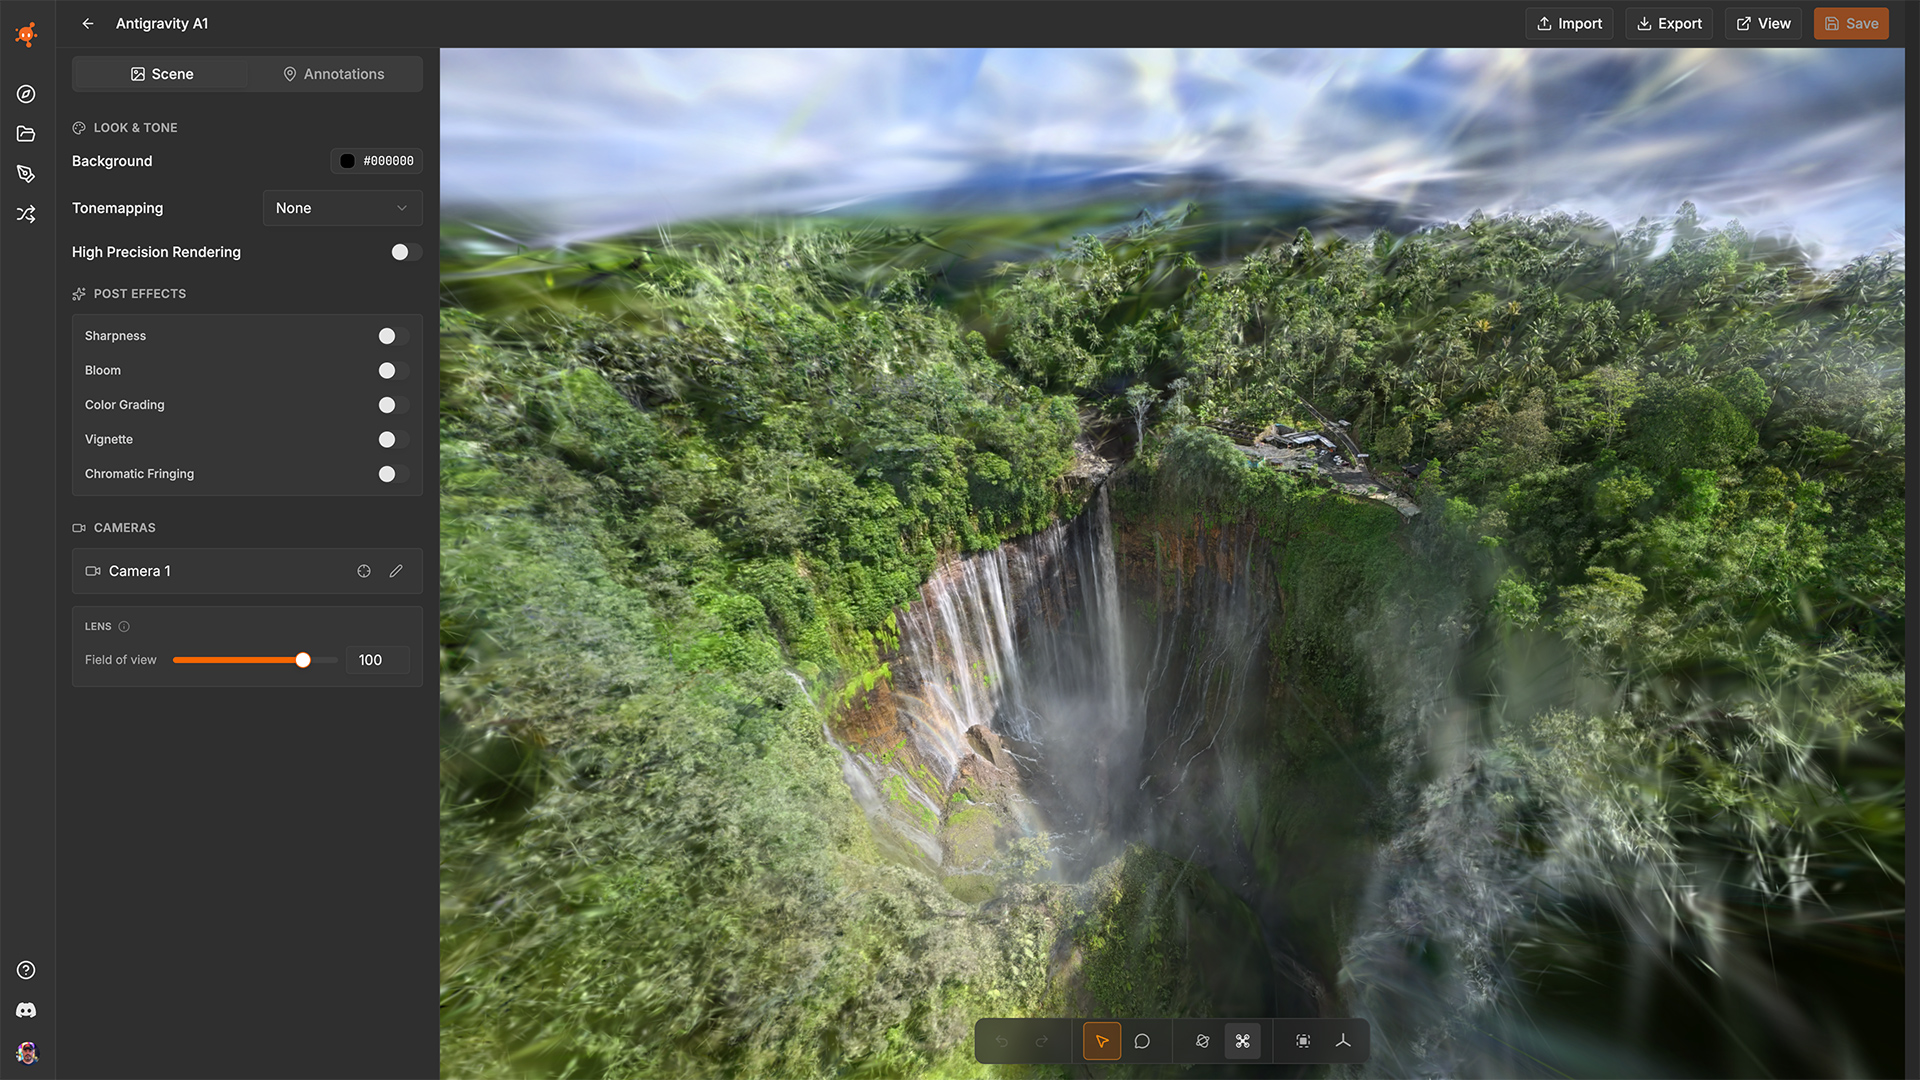
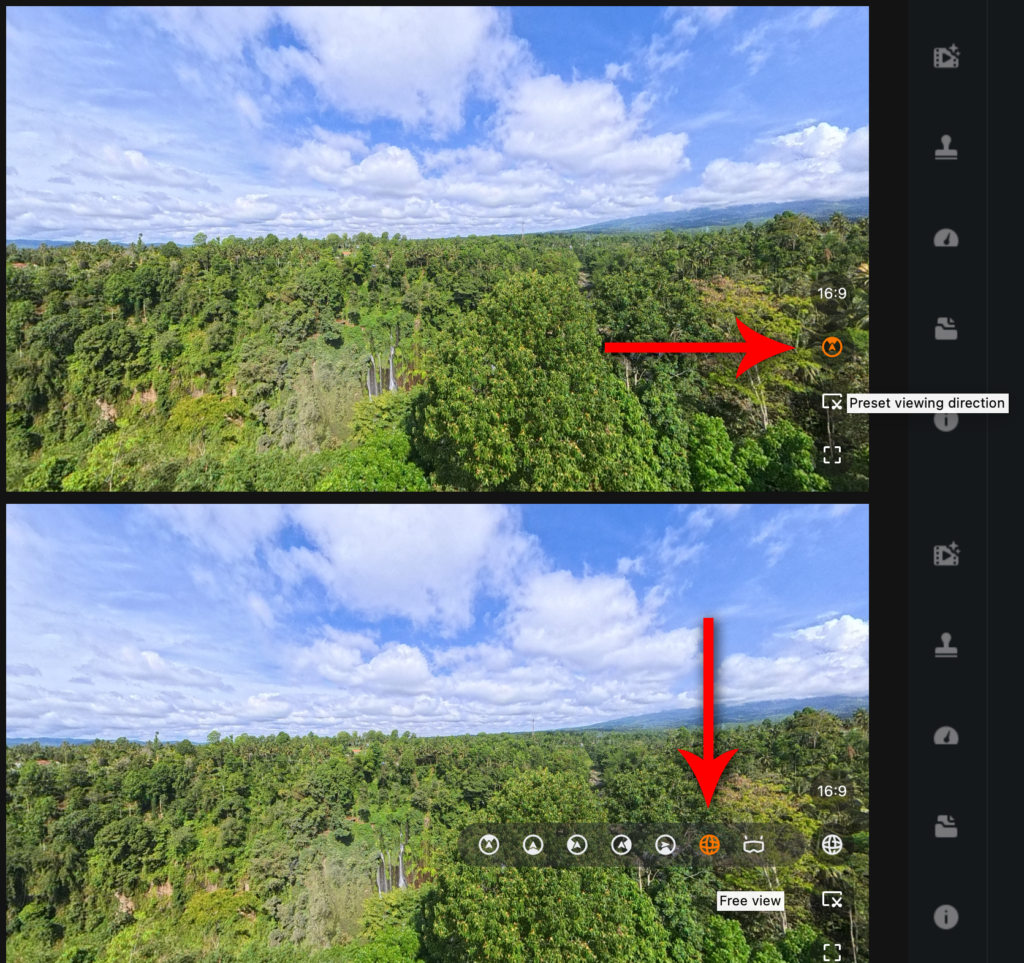
With the current economy thanks to stupid unnecessary wars, I’m unable to get the Antigravity A1, but we have some sample footage, source in the previous article, so here are the steps, first I stitched the VID_20251107_081816_126.insv using the Antigravity A1 Studio desktop app, make sure to set the Preset Viewing Direction to Free View:
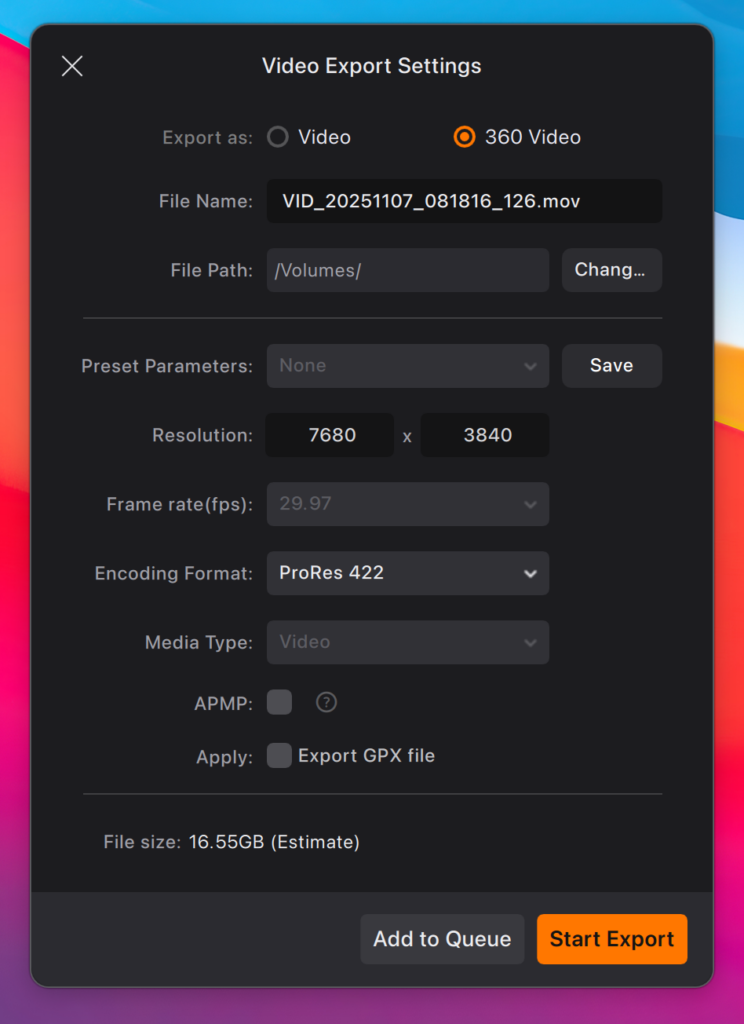
Then export the video in 360 format, I use Apple ProRes to avoid image degradation, this is up to you because it requires some hard drive space:
Now that we have an equirectangular video, we can use some command line tools like Sharp Frames to get just the best frames from the video, PyCOLMAP for reconstruction and Brush for gaussian splatting, and to make things easier, I created some scripts and I made a cheat sheet with installations instructions: https://github.com/rodrigopolo/clis/tree/main/GaussianSplatting
Once the command line interface apps (CLIs) are installed, and the scripts are downloaded, we can run each command, assuming that our 360 video is in our desktop with the filename input.mov and that we aim to export the project into a folder called Project in the desktop, let’s extract the sharp frames:
# Exctract sharp frames and diretory structure creation
~/clis/GaussianSplatting/Exctract.sh \
--scenedir ~/Desktop/Project \
--fps 3 \
~/Desktop/input.mov
Now for the scene reconstruction, let’s run all COLMAP commands:
# Run COLMAP reconstruction using PyCOLMAP
~/clis/GaussianSplatting/A1PyColmap.py \
--scenedir ~/Desktop/Project
And finally, Brush for gaussian splatting
# Run Brush selecting the best sparse
~/clis/GaussianSplatting/Brush.sh \
--scenedir ~/Desktop/Project
The process for this video took around 8 hours and 11 minutes, the slowest tasks were the COLMAP matcher and Brush, and after some tests I got to know it took around 6 minutes per 1k steps or 10k steps per hour, here is the broken-down timeline:
| Task | Time hh:mm:ss |
|---|---|
| Sharp frames exctraction, 63 frames | 1:07 |
| COLMAP reconstruction using PyCOLMAP | 18:30 |
| Brush 30k steps 4M splats | 2:05:12 |
| Total: | 2:24:49 |
And here is the result:
Not bad for a gaussian splatting made without an NVIDIA GPU and without trowing money at some proprietary software, now, I’m new into the gaussian splatting thing, I guess more experience users could improve the scripts, tell you which amount of splats are recommended and how many steps, in my short experience, 30k steps is more than enough:
If you find this information useful and want to support truly independent creators, you can donate here: https://www.paypal.com/paypalme/RodrigoPolo
Small update
To make sure everything works as expected and 100% automatic, I ran the following commands by just pasting all at once in the macOS console and let it run:
scenedir=~/Desktop/Test2
input=~/Desktop/input.mov

~/clis/GaussianSplatting/Exctract.sh \
--scenedir ${scenedir} \
--fps 3 \
${input} && \
~/clis/GaussianSplatting/A1PyColmap.py \
--scenedir ${scenedir} && \
~/clis/GaussianSplatting/Brush.sh \
--scenedir ${scenedir}
2h 31m later I got this: