
Decoding C-log on the EOS R5 and Resolve 17
Check the Ultimate Atomos Ninja Setup Guide for Canon and Sony Cameras: https://youtu.be/iv3rreK0D9Q
I have used the Canon EOS 5D Mark IV with Canon Log, the Canon EOS R, and now the Canon EOS R5, all with Canon Log (C-log for short) in order to have the best quality, and allegedly, endless posibilities of color grading. But I haven’t found how to achive the quality every reviewer claim C-log can provide.
What anyone expect
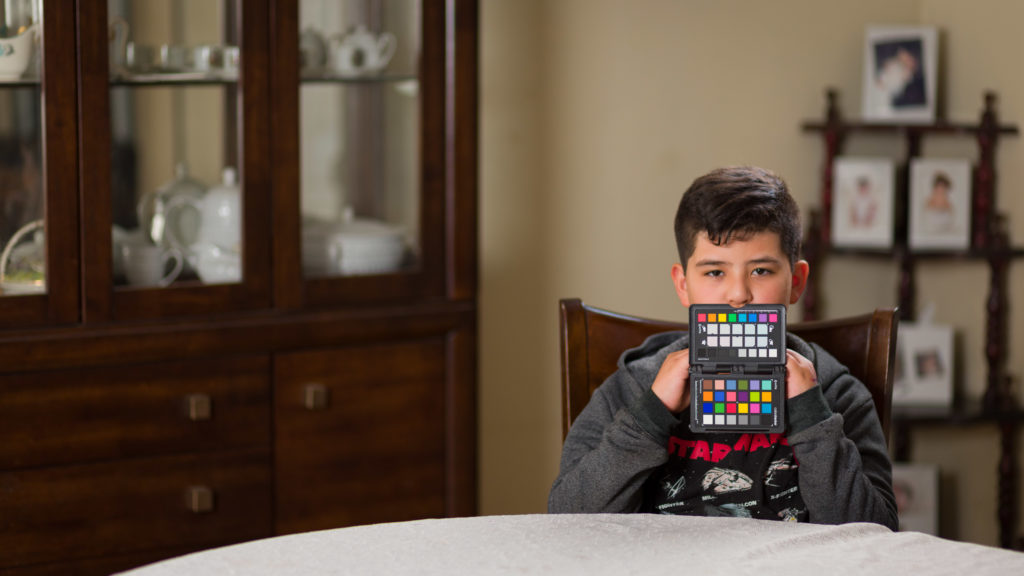
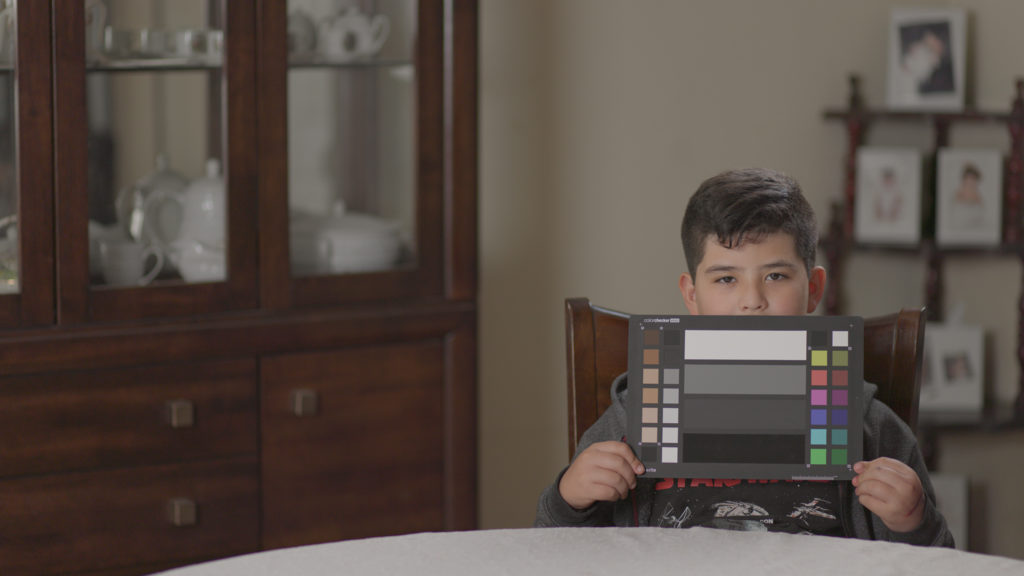
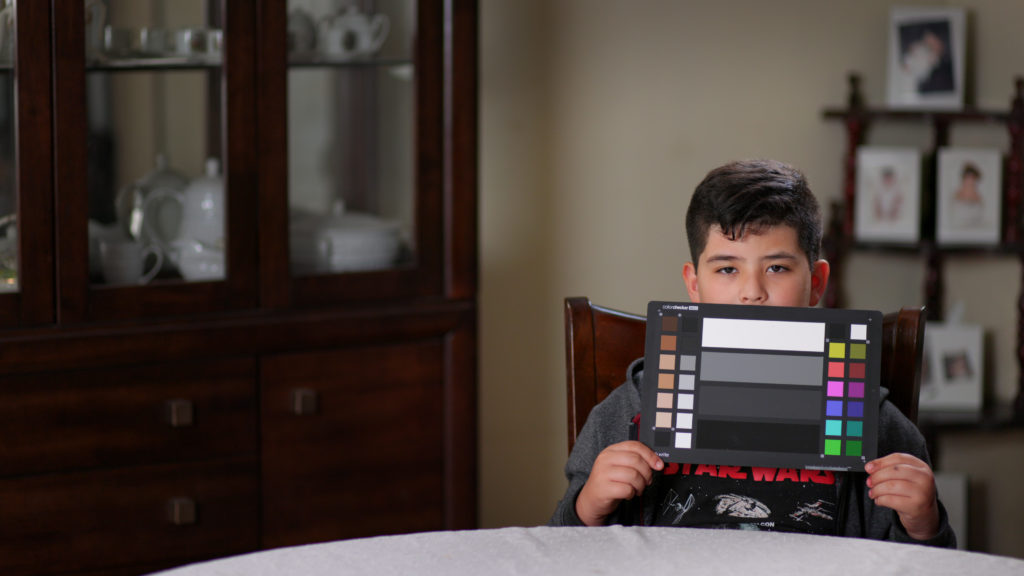
When you film with a DSLR or mirrorless camera, you expect to create videos with the same quality, or a quality close to what you get from the RAW image after editing the image in Adobe Lightroom, so lets start at that point, using a RAW image. I used some Godox LED lights with soft defusers, the EOS R5 with a EF to RF adapter, and a EF 85mm f/1.8 lens. I used a fixed white balance and exposure on the video camera settings based on an external monitor using false color and RGB Parade, 1/50s shutter speed, ƒ/1.8 aperture, ISO 400 for C-log.
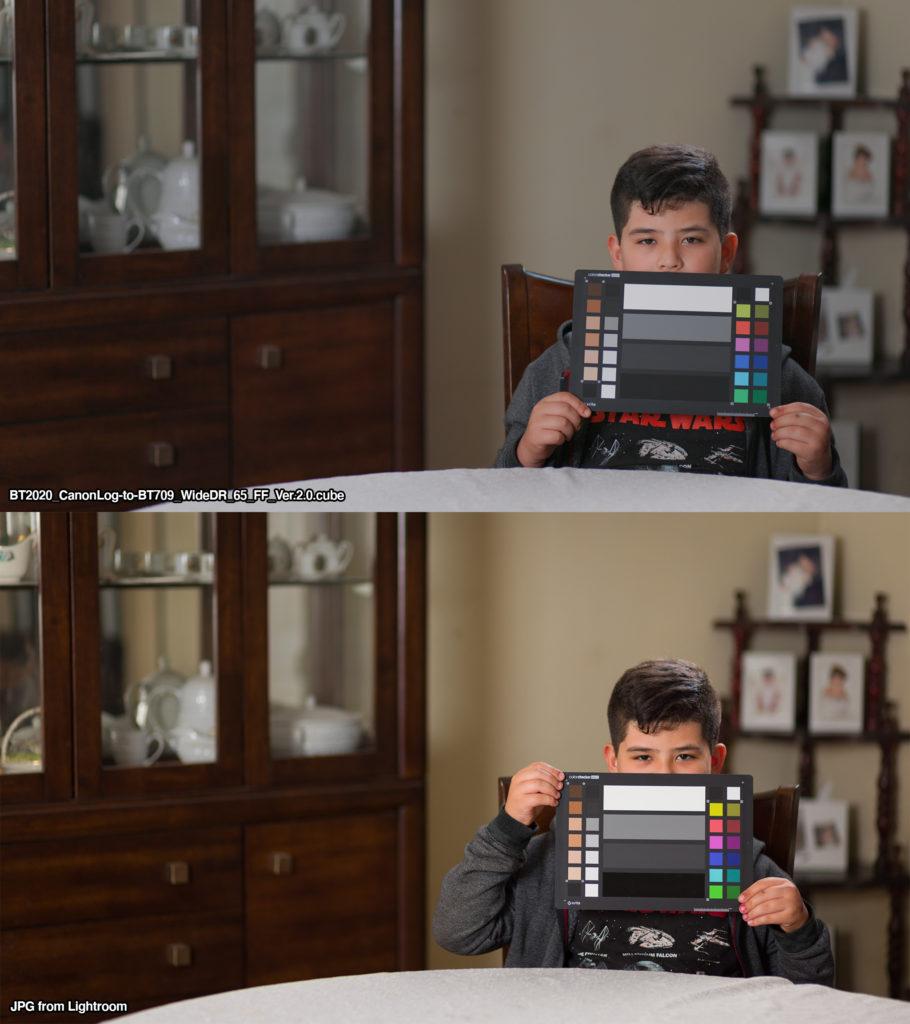
I took some photos using the X-Rite ColorChecker Passport and the X-Rite ColorChecker Video for reference. Using the ColorChecker Camera Calibration 2.2.0 plug-in in Adobe Lightroom I calibrated the image color, having the following result:

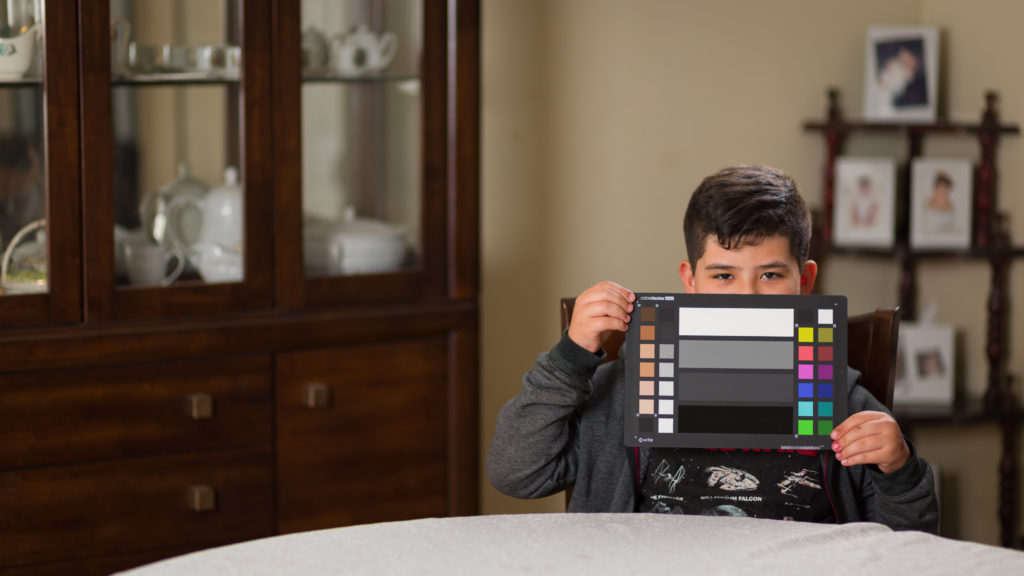
And just in case, here are the images with the calibration charts:
Some caveats and workarounds
Overheat and external recording
Yes, the EOS R5 overheats in hot weather, yes, even while using 4K-HQ (downsampled 8K to 4K), and yes, Canon keept the 30 minute limit, that is why the Atomos Ninja V monitor/recorder I had to get in order to achieve 10bit video on the EOS R, is so useful, in fact, I cannot recommend this monitor/recorder enough, having false colors for exposure, RGB Parade for white balance, recording directly to a SSD drive which then can be connected to your PC and edit from the external drive… its priceless, it makes creating videos for YouTube something easy.
Full range vs. legal range
One downside of external recording is the infamous video data levels, in one side you have video levels, partial range, legalized video, etc. all those means the same, and in the other side you have full levels, full range, non-legal levels, etc. again, all those terms means the same. Why use different names for the same thing? Lack of standarization? Manufactures enjooying user confusion? Don’t know, but every software and hardware manufacturer has a diferent name for the same thing, so video levels, partial range and legalized video means that in a video that uses 8bits per RGB channel, the range from drakness to brightness has to fit withing a value of 16 to 235 (64-940 for 10bit), and in the case of a video with full levels, full range or non-legal levels, the range has to fit withing a value of o to 249 (0-1023 for 10bit), there are lots of articles that cover this topic so to keeps things simple, all Canon cameras output full-range video, and without the necesary metadata that states that a video is a full-range video Adobe Premiere display the wrong range, but who cares, when it comes to color correction and grading, Adobe Premiere sucks big time, so use Davinci Resolve instead (which has a free version), where you can change the video data levels in each clip. But if you are strong headed, enable the “legalize” toggle in your Atomos Ninja V and have a video with compressed levels.
Comparison between recordings
In order to see how much I can get from the EOS R, I’ll compare some internal recording in the best achivable quality in both, RAW and HEVC/H.264 codecs, comparing them with the external recordings using the Atomos Ninja V.
Internal vs. External video
The first difference between the internal 4K-HQ 4:2:2 10bit HEVC/H.265 video and the 4K 10bit ProRes video recorded externaly by the Atomos Ninja V was the video levels, but just switching the clip levels to “full” fixed the issue. By the way, I’m using DaVinci Resolve 17.1B Build 21 on a MacBook Pro (13-inch, M1, 2020) with 16GB RAM in order to decode 4:2:2 10bit HEVC/H.265.
Which LUT to choose from?
Canon provides their log cameras with its “Canon lookup tables” or LUTs that handles LOG footage, the latest version available is the 201911, and here is the first problem. Resolve and most video software and hardware vendors work with video defining its “Color Space” and its “Gamma”, LUTs provided by Canon have a name convention that clearly states first, the input color space, the input gamma, and then the desired output color space and gamma. So why the heck the EOS R and EOS R5 have the “Color Matrix” option and why interfere with the Color Space?
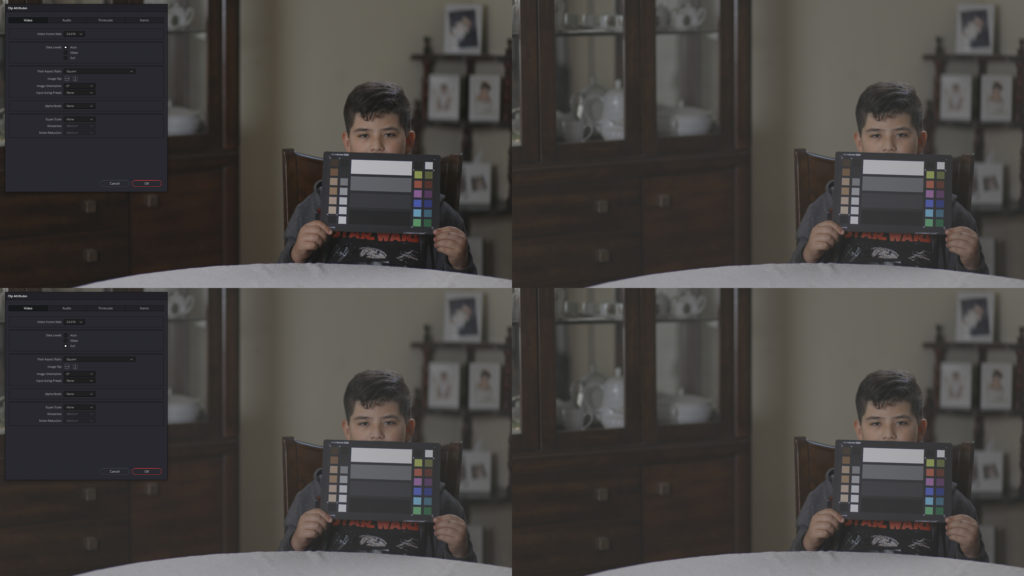
Where in the Canon provided LUTs is the LUT for the “Cinema EOS Original” and which one is for “Neutral”? Don’t know, so let’s try applying the “BT709_CanonLog-to-BT709_WideDR_65_FF_Ver.2.0.cube" LUT to the internal recorded footage that used “Cinema EOS Original” Color Matrix and BT.709 Color Space, yes BT.709 is the same as Rec.709, and BT.2020 is the same as Rec.2020, Why using different names? Don’t know. So here is the result in both, internal and external footage, having the external footage in full video range:
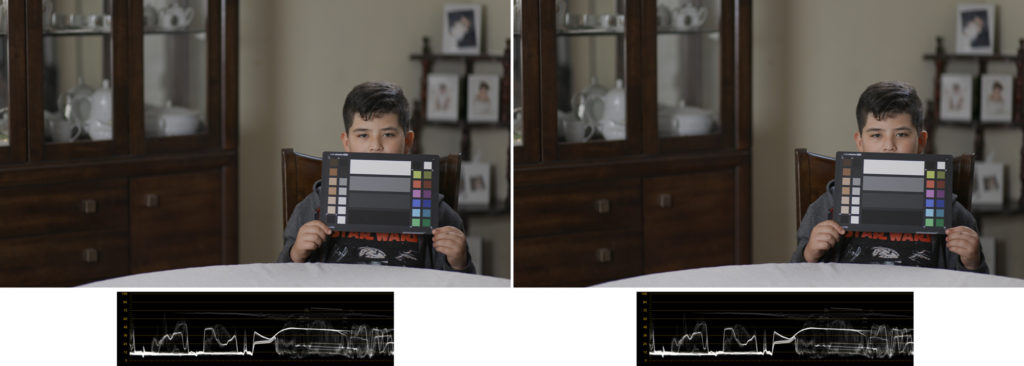
As you can see, results between both images are indistinguishable, just some minimal differences, something negligible, nevertheless, it doesn’t look as the image we took at the begining of this article, it lacks the saturation and contrast, skin color is almost green. Could it be that I’m using the wrong LUT? Well I saw the Canon EOS R5 specs sheet where it says that “Color Matrix” is the same as “Color Space”, Is it? It also says that “Full Range” is 128 to 1016, which in fact is video/legal/partial range. WTF Canon?

Lucky for me I can install and use Mediainfo, and using this tool I verify that the video I recorded is using Full Color range, BT.709 Color primaries and BT.709 Matrix coefficients, so why my video doesn’t look like Rec.709 after applying the LUT? Let’s try the “BT2020_CanonLog-to-BT709_WideDR_65_FF_Ver.2.0.cube” LUT, here are the results compared to the picture:
A huge improvement over the other LUT, could it be that the video is using BT.2020 instad of BT.209?
Using DaVinci Color Space Transform
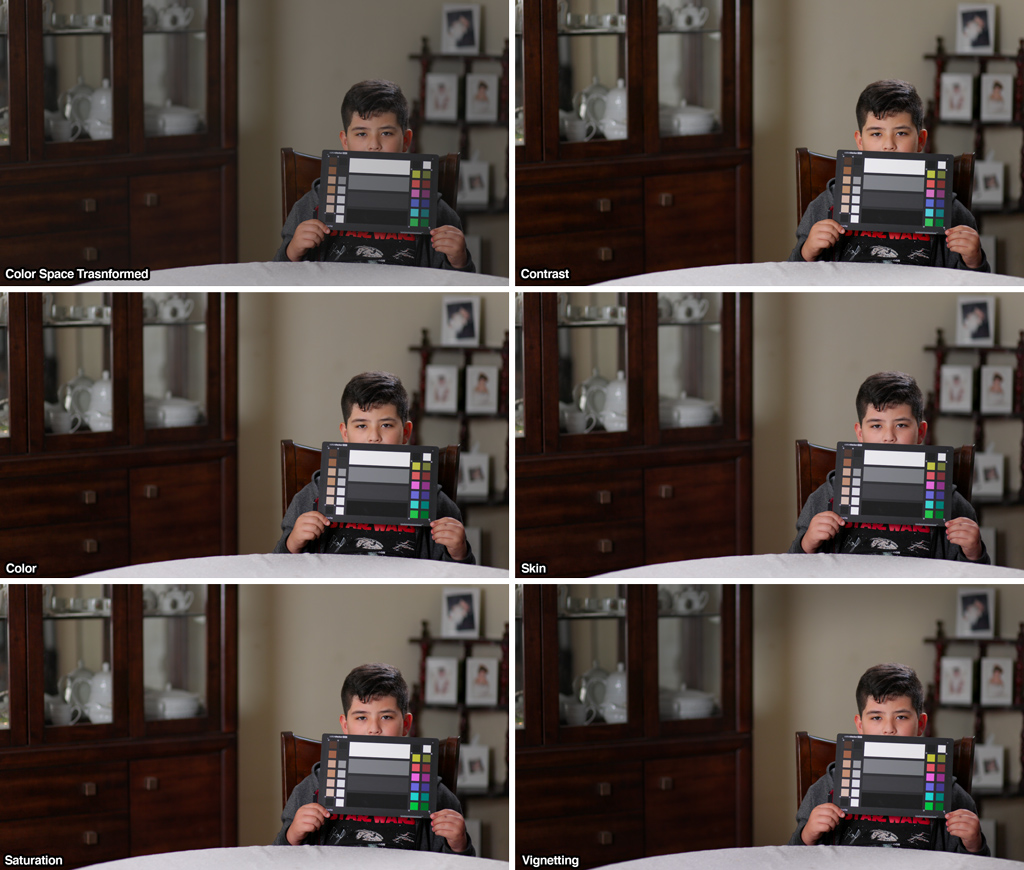
Instead of LUTs, that many claim coud clip the footage, let’s use DaVinci Resolve’s Color Space Transform effect to convert the footage from LOG to Rec.709, here is a comparison between LUTs in the upper row, and Color Space Transform in the lower row:
In both cases, with LUTs and Color Space Transform, using Rec.2020 as the input color space produces more vivid colors. What about RAW?
Dealing with RAW in Resolve
Yes, I know that DaVinci Resolve 17 has a great color managment, for sure I can use the “DaVinci YRGB Color Managed” color science and the “DaVinci Wide Gamut” color management preset, but there are no LUTs without Color Space Transform, and Resolve settings for decoding RAW are not precisly ready to just export:
My goal is to edit the external footage from the Atomos Ninja, getting the most out of it, so in this comparison I’m using 8K RAW video recorded from the EOS R5 to have an idea how to get the best quality availabe, I set the project to use “DaVinci YRGB” color science and “Rec.709 (Scene)” for the timeline color space, the default settings in resolve decode the RAW using Canon Cinema Gamut and Canon Log 2 for Gamma, so I’m using the “CinemaGamut_CanonLog2-to-BT709_WideDR_65_FF_Ver.2.0.cube” LUT and a Color Space Transform, and here you’ll see there is no consistency at all:
Indeed, any of this samples can be graded using the marvelous tools Resolve provides, but why there is such a discrepancy between LUTs and Color Space Transforms? Why is it that the Canon provided LUTs don’t produce trully Rec.709 footage?
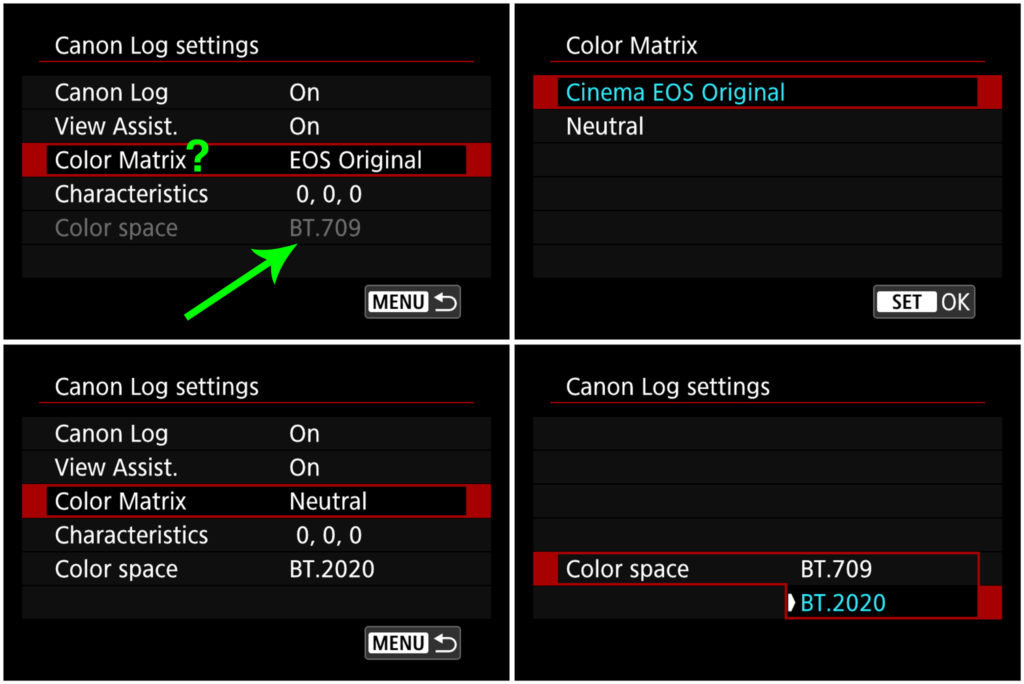
Cinema EOS Original vs Neutral
If the Color Matrix is set to Cinema EOS Original, the color space is limited to Rec.709, if it is set to Neutral, Rec.2020 is available, let’s compare both using it’s recomended LUTs and Color Space Transforms:
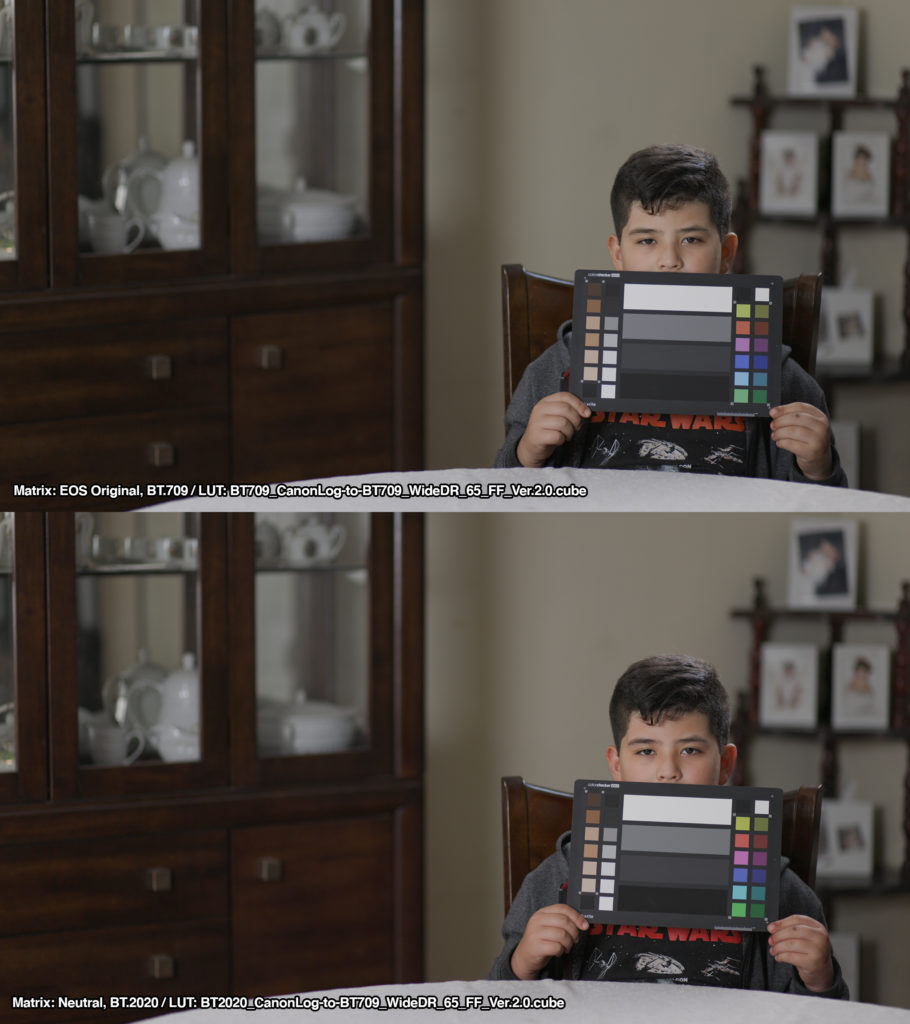
Here I found some conclusion, indeed, Neutral Matrix produces better results while using Rec.2020 Color Space and using Color Space Transform to DaVinci user timeline, but none of the tests provided a one click solution to convert easly from C-Log to Rec.709, so the next step is to create our custom look.
Custom look and exporting a LUT
After all tests, the best setting either for internal or external recording is using Neutral Color Matrix and Rec.2020 color space with C-Log, the only difference between internal and external is that you’ll have to set each clip to full range mode.
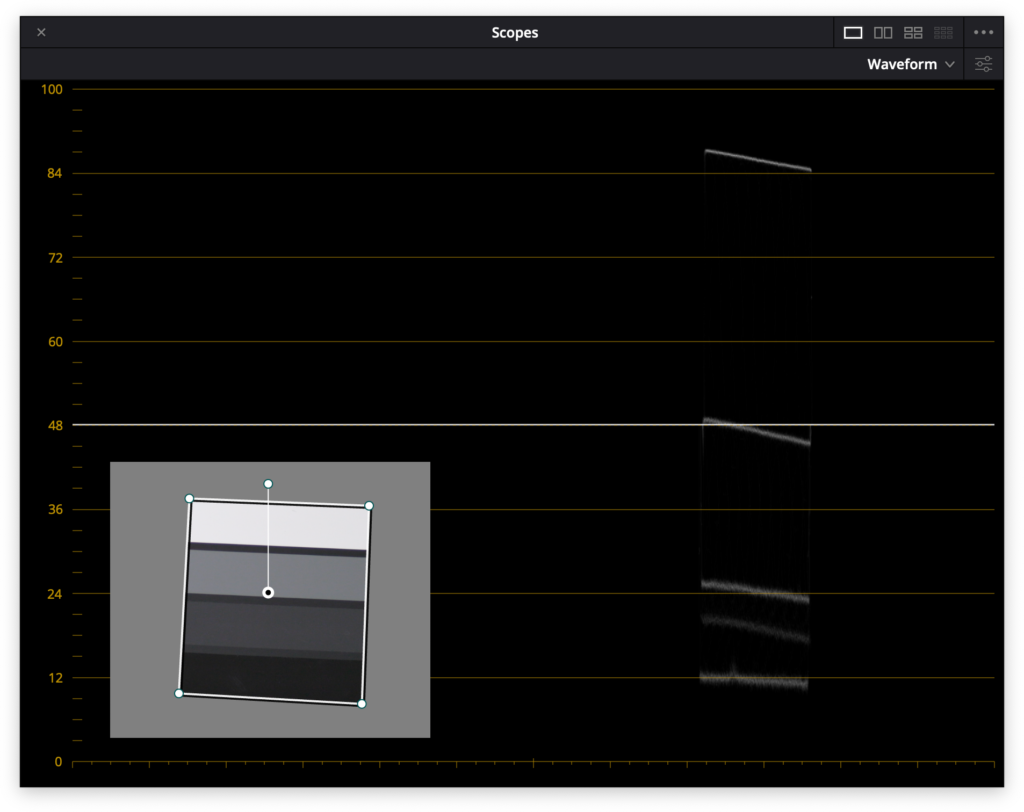
Using the the X-Rite ColorChecker Video and the online documentation, we know that the the white stripe is around 90 to 100%, the light grey is around 40 to 50%, the dark gray is around – 20 to 30% and the black is around 0 to 10%, so masking that area and using the Waveform in Resolve as reference, moving the luma Curves:
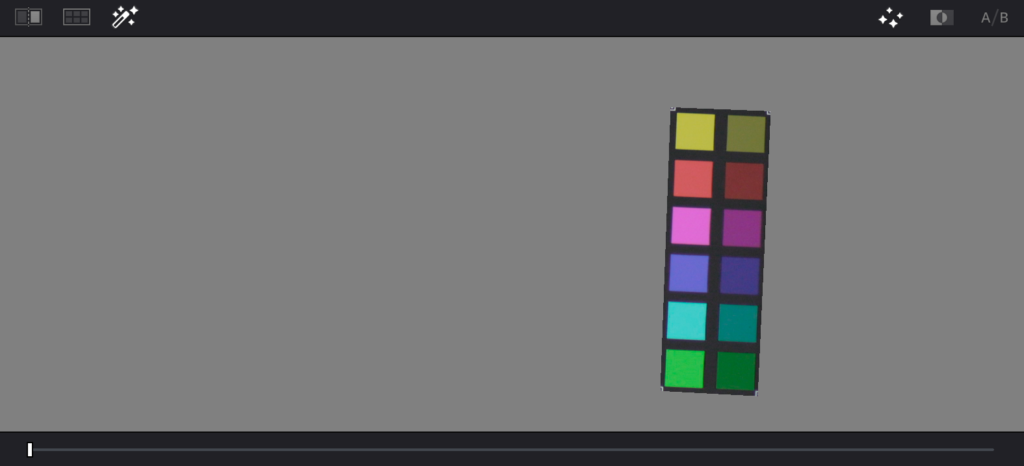
The next step, having a neutral image using the Vectorscope, masking the color chips from the X-Rite ColorChecker Video, and moving the “Hue vs. Hue” curves combinded with the “Hue vs. Sat” curves:

And here the whole process:
And here is the result:
In conclusion, RAW is hard to color correct and grade, and it shouldn’t; Canon has a poor and bad documentation; C-log (1) sucks; DaVinci Resolve rocks, the MacBook with the M1 rocks, and I believe I’m overthinking this sh*t.
hehe, this is just too funny to read!
I am currently in the same situation… “Color mess with R5 – clog1/2 – Resolve.”
Do you have any news on that?
Also, it would be very helpful to release your gradings/luts here.
(some people may not have a color checker)
As a photographer, I really share your attitude to edit raw-video like raw-image. thumbs up!
Only some instances of CinemaDNG and only in Adobe After Effects one can achieve the power of the Adobe Camera RAW dialog window, and it is painsfully slow hahahahaha, the controls for RED RAW provide almost the same control in every non-linear editor, something Canon should invest more time doing. I’m glad you find something useful here.
hey there,
just wanted to tell you my current results:
I use
-“CanonLog”, Neutral, 2020
– MP4 IPB (not raw)
for any resolution/framerate on camera
In resolve, I use the
BT2020_CanonLog-to-BT2020_709WideDR_65_FF_Ver.2.0.cube
from the current canon page.
…and add some saturation.
that works like a charme.
BUT, no success with doing the same with RAW instead of MP4.
Colors are always off center in the vectorscope.
I tried to calibrate them with the colorchecker like you described, but that gave only a weird color-mess.
but for now, i am very happy with the clog-mp4-10bit 🙂
Resolve interprets RAW as “C-Log 2 / Cinema Gamut”, even though it is supposed to be “Cinema Gamut”, for some reason, colors look bad, but using the “BT2020_CanonLog2-to-BT709_WideDR_65_FF_Ver.2.0.cube” or the “Color Space Transform” choosing “Rec.2020” and “Canon Log 2” as input color space and gamma, and out to “Use timeline”, produces better results, here is a test I did:
https://rodrigopolo.com/2021/05/12/eos-r5-c-log-3-ninja-v-and-resolve/
Struggling with the same problem.
But when I only use the RAW module I get excellent results.
Decode quality: Full-res Canon
Decode using: Clip
White Balance: Daylight
Color space: Rec 709
Gamma: Canon Log 3
And without making a node, just by tweaking Tint, Exposure and Highlights..
If you set the Resolve “Project Settings->Color Management”, “DaVinci YRGB Color Managed” as “Color science” and “Davinci Wide Gamut” in “Resolve color management preset”, you’ll have the same results, here is a guide I recenlty did exploring al the available options with C-log and C-Log 3 using internal and external recorded footage:
https://rodrigopolo.com/2021/05/12/eos-r5-c-log-3-ninja-v-and-resolve/
I read all your articles about clog.Canon can give the black and white point values of the log and log3 is particularly good, and it is important to know that Sony does not have these specifications.Exposure should be as close to 1023 (Clog3) as possible and lower exposure in post to reduce noise,right?
It depends, C-Log 3 is designed to be easily corrected, C-Log 2 for pros who want to have more room for corrections, both are supposedly required to expose to the right, or overexposure one extra stop, but what I do is easier, I set the camera in C-Log 3 / Rec.2020 (which is supported by HDMI), connect the camera to an external monitor where I load the LOG to Rec.709 LUT, in the case of the Ninja V, enable “Legalize”, and over that, I enable the False Color in order to see the exposure, this should also work for any Sony camera with LOG.
https://rodrigopolo.com/2019/12/17/exposing-x-log-using-false-colors/
https://www.danielhaggett.com/blog/262-how-to-expose-log-footage-correctly